
Spring boot 3 microservices with Spring Cloud Part-1
- Nov 1, 2023
- 6 min read
Updated: Jan 30, 2024
Introduction
In this article, we will do a deep dive in to spring boot microservice development using Java, Maven and related spring components. You can find the code changes for the example
Spring boot 3 starter
You can use pre initialized project for creating each spring boot project. Follow below steps for the same
Open https://start.spring.io. and add all the dependencies for an application.
Select Maven and select Java version 17.
Click Dependencies add required dependencies for a project.
Click Generate.
Download the resulting ZIP file, zip file contains project with all required libraries which you can import from IDE.
Implementing Service Discovery
Consider a case when there are number of small services running in your application and each service is communicating with number of other services. These services are distributed across the network and they have multiple instances running in the cloud environment. Each service instance undergo regular changes like ip address change, n/w upgrade and scaling. In this scenario, we need a service which can dynamically keep track of all changes and provide monitoring of each service.
Service discovery address this issue in detail. Service discovery is one of the microservice architecture pattern where each service is supposed to register itself to the registry server with meta data information like service name, host and port number. Service registry act as a central place to look up for any service and use the same. Individual services sends heartbeat to discovery server and let it know that the service is alive.
Service registry knows network location and status of all the services registered with server. If any service wants to call another service it just need to make a request to discovery server, rest all task related to searching, locating and connecting to the service is taken care by the eureka server. For example if department service wants to know all the employees for a particular department, it just need to create REST client and registry will provide that information. As employee service is already registered in the service registry, it has latest updates on location of the service and can give you the expected results.
In this example, we have used netflix eureka server. Perform below steps to create eureka server as a separate spring boot project.
create a spring boot project with https://start.spring.io/
Make sure to annotate application class with @EnableEurekaServer.
Add server port and application name to application.yaml file
Add following dependencies for eureka server project pom.xml file.
By default, registry also try to register itself, in order to avoid that you need to make eureka.client.register-with-eureka=false
server:
  port: 8761
spring:
  application:
    name: service-registry
eureka:
  client:
    register-with-eureka: false
    fetch-registry: false
    service-url:
      default-zone: 		   http://${eureka.instance.hostname}:${server.port}/eureka
<dependencies>
	<dependency>
		<groupId>org.springframework.boot</groupId>
		<artifactId>spring-boot-starter-web</artifactId>
	</dependency>
	<dependency>
		<groupId>org.springframework.cloud</groupId>
		<artifactId>spring-cloud-starter-netflix-eureka-server</artifactId>
	</dependency>

	<dependency>
		<groupId>org.springframework.boot</groupId>
		<artifactId>spring-boot-starter-test</artifactId>
		<scope>test</scope>
	</dependency>
</dependencies>
Spring cloud config server
spring cloud config server provides central place for all configuration present in your application. In a microservice environment it is not possible to manage separate configuration for each service therefore a separate microservice for configuration is considered called config server. There is a need to manage all microservice configuration in a consistent way and can handle configurations for 100s of microservices for different environments. cloud config servers comes up with number of benefits including integration with version control system. It can pull the files directly from the version control instead of separately modifying microservice code and deploying again and again. In a nutshell config server provides managed way of handling config changes without requiring separate microservice instance restart for each small config change.
consider below maven dependencies for spring config server project.
<dependency>

    <groupId>org.springframework.cloud</groupId>

    <artifactId>spring-cloud-starter-config</artifactId>

</dependency>

<dependency>

<groupId>io.micrometer</groupId>

<artifactId>micrometer-tracing-bridge-brave</artifactId>

</dependency>

     <dependency>

        <groupId>io.zipkin.reporter2</groupId>

       <artifactId>zipkin-reporter-brave</artifactId>

</dependency>
config server creation steps:
Create a new @SpringBootApplication class and annotate it with @EnableConfigServer to enable the configuration server functionality.
create a config directory to keep each microservice yaml configuration file
create a application.yaml file and add server port and active profile
Start the configuration server, and it will automatically serve the configuration files to the microservices in our application.
Log tracing with Zipkin server
zipkin is a distributed tracing system allows you to track API requests, response, queries, logs and other meta data about the operations. zipkin also provides UI to view traces. when there are number of microservices inter communicating with each other it is important to capture the log trace. spring boot integration collects all the log data within microservice and publish it to the zipkin server where you can find the entire trace from start till end. you can find more details here. https://zipkin.io/
you can easily download, install and run the zipkin server locally and it will look like
java -jar zipkin.jar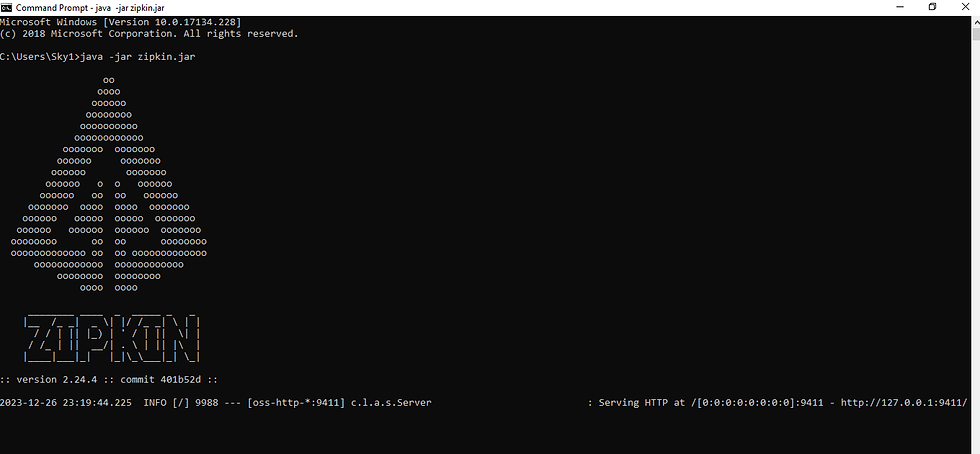
URL : http://localhost:9411/
you need to add the following dependencies to the config server project to add zipkin support. Also yaml configuration needs to be updated for employee and department microservices.
<dependency>
		      <groupId>io.micrometer</groupId>
		      <artifactId>micrometer-tracing-bridge-brave</artifactId>
	    </dependency>
    	<dependency>
     	 	<groupId>io.zipkin.reporter2</groupId>
      		<artifactId>zipkin-reporter-brave</artifactId>
    	</dependency>
Spring boot 3 Microservice with Spring Cloud
Now, let's develop some microservices that will interact with each other using RESTful APIs. For simplicity, let's consider two microservices: employee-service and department-service.
create a new spring boot application for each microservice as explained before.
add the @EnableDiscoveryClient annotation to enable service discovery using Spring Cloud Netflix Eureka. Each microservice should be a discovery client since it needs to register with eureka server.
use Spring Web to expose RESTful endpoints and handle the necessary business logic in each microservice
add config server url to the microservice project so as to look out for all config parameters
add employee-service.yaml and department-service.yaml to config server
below dependencies should be added to both employee and department project pom.xml file. Additional dependencies for zipkin server and junit can be added
<dependencies>
		<dependency>
			<groupId>org.springframework.boot</groupId>
			<artifactId>spring-boot-starter-actuator</artifactId>
		</dependency>
		<dependency>
			<groupId>org.springframework.boot</groupId>
			<artifactId>spring-boot-starter-web</artifactId>
		</dependency>
		<dependency>
			<groupId>org.springframework.cloud</groupId>
			<artifactId>spring-cloud-starter-netflix-eureka-client</artifactId>
		</dependency>
	    <dependency>
	      <groupId>org.springframework.cloud</groupId>
	      <artifactId>spring-cloud-starter-config</artifactId>
	    </dependency>
		<dependency>
			<groupId>org.springframework.boot</groupId>
			<artifactId>spring-boot-starter-test</artifactId>
			<scope>test</scope>
		</dependency>
department-service.yaml as below
server:
  port: 8081

eureka:
  client:
    register-with-eureka: true
    fetch-registry: true
    service-url:
      default-zone : http://localhost:8761/eureka/

spring.zipkin.base-url : http://localhost:9411/
management:
  tracing:
    sampling:
     probability : 1.0

eureka.instance.hostname: localhost
eureka.instance.prefer-ip-address: true
We are going to add rest end points to employee and department services and it will require us to create basic spring mvc skeleton including controllers ,services and repositories. In this example we are not adding any external database and we will keep it for illustration purpose.
employee-service APIs
/employee/add
/employee/{id}
/employee/all
find all employees belongs to a department
/employee/department/{departmentId}
department-service APIs
/employee/add
/employee/{id}
/employee/all
find all departments with employees /employee/all/department-employee
Web Client
if we want to get all employees for a department, we need to use employee microservice from department service. we have to create employee client and connect from department service.
We have below options to create a client using spring boot.
RestTemplate(deprecated)
Feign client
Webclient
Declarative HttpClient
FeignClient is synchronous and follows Thread per request architecture style. Spring webclient is a non blocking reactive library to create REST client included from Spring 5 where as Webclient provides fluent API for binding and executing http request.
We are going to use the Declarative http interface which is introduced in spring 6 and spring boot 3. It supports both blocking and reactive return values. Following dependency needs to be added to department service project
<dependency>
      		<groupId>org.springframework.boot</groupId>
	        <artifactId>spring-boot-starter-webflux</artifactId>
</dependency>
Create the EmployeeClient interface and annotate it with @HttpExchange. The annotation represents that we can include method on an HTTP service interface as an HTTP endpoint. Now add the method to collect all employees for a department.
findByDepartmentId(@PathVariable("departmentId") Long departmentId)
@GetExchange - denotes that it is a HTTP Get method call
Let us summarize what we have achieved till this point. we have learned importance of service discovery microservice pattern and created the eureka server project. We also understood the concept of spring cloud config server and its usage then we added the zipkin server into the stack.
Lastly, couple of microservices with REST end points along with declarative http client to fetch the employee data. We should be good to build the project using maven and start the individual microservice.
Here we can use IDE provided maven or we can include local maven installation as well. If you want to include external maven just go to your eclipse Window->Preference->Maven->Installations and provide local maven installation path.
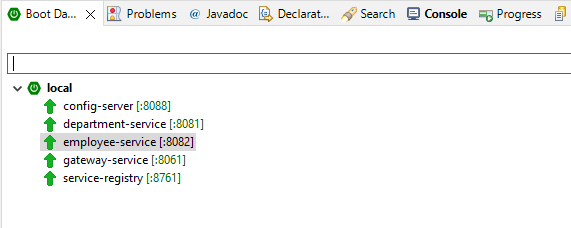
Once you have all services up and running, you can verify the logs in the console. The spring boot dashboard should look like below :
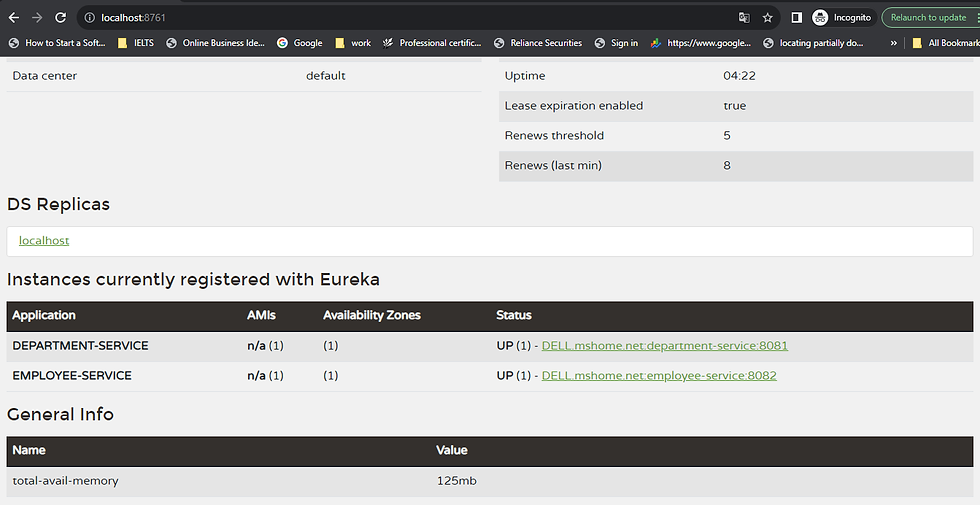
you can notice that when service registry is up it shows both employee and department service status in the browser.
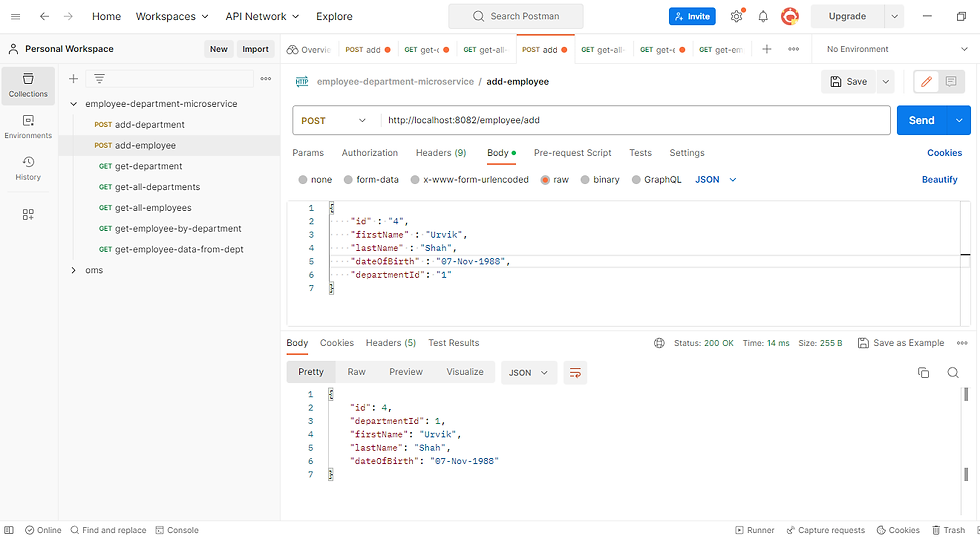
API Testing
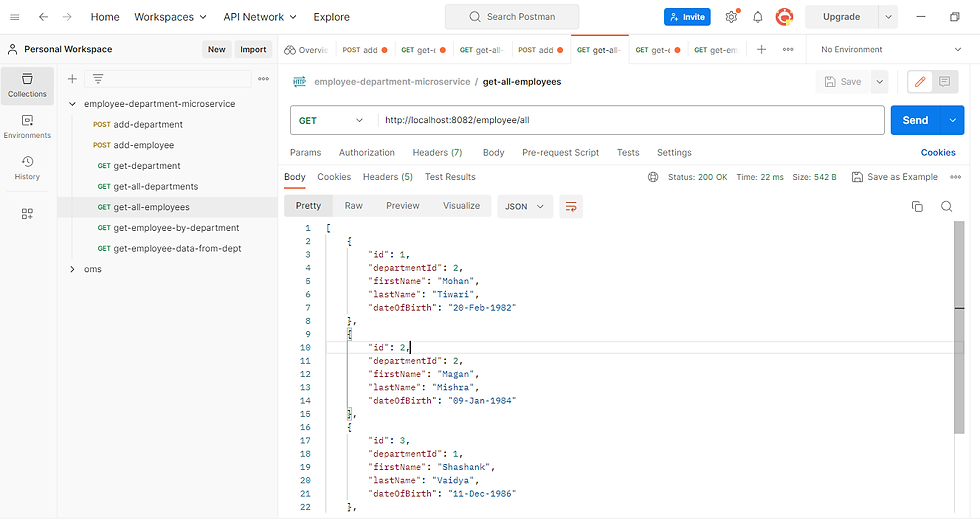
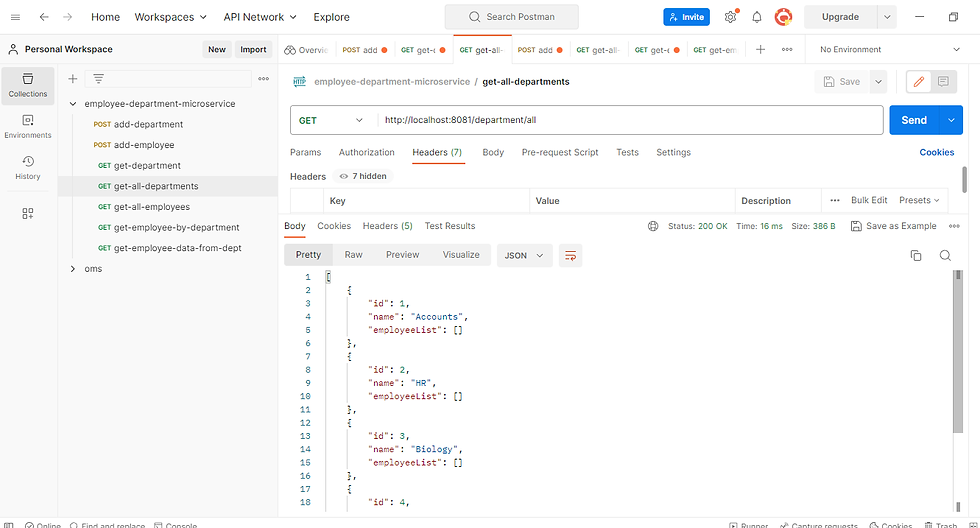
we use the postman to perform API testing. you can check employee and department service APIs by providing respective data.

get all employees
get all departments
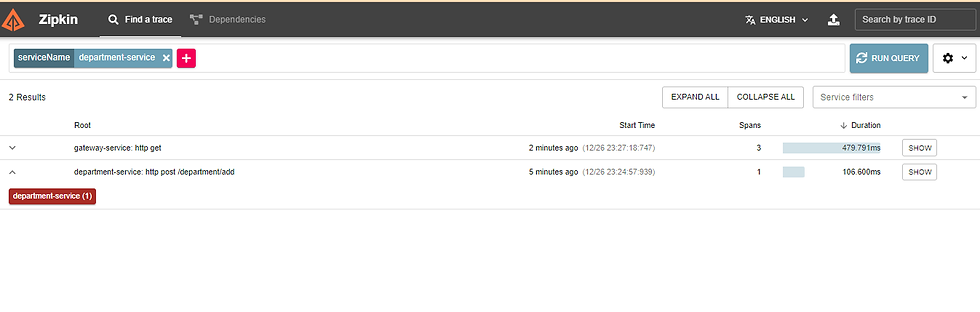
Also notice that these API requests can be tracked in the zipkin server as below.
You can find the code changes for the example here
Conclusion
Here, we have explored the step-by-step process of developing a microservices application using Spring Cloud. We have covered essential components like the configuration server, microservices, discovery service, http client, and API Testing. We will see some more features like Spring cloud gateway, JUnit 5, Code coverage with Jacoco and Sonarqube integration in the part-2

Comments